If you’re searching for reliable ways to stay ahead in tech innovation, discover the latest digital trends, and master modding without compromising performance or security, you’re in the right place. The fast-moving world of coding frameworks, optimization strategies, and game modifications can be overwhelming—especially when new tools and updates appear almost daily. This article is designed to cut through the noise and give you clear, actionable insights you can apply immediately.
We analyze emerging technologies, evaluate modding tools, and review performance-enhancing techniques using hands-on testing and real-world benchmarks. That means you’re not just getting surface-level commentary—you’re getting insights grounded in practical experience and careful research.
Whether you’re exploring new frameworks, fine-tuning system performance, or learning safe mod installation practices, this guide will help you make informed decisions, avoid common pitfalls, and stay confidently ahead in today’s evolving digital landscape.
Your Essential Pre-Modding Safety Checklist
First, back up your saves. Corrupted files are common; in community surveys on Nexus Mods, stability issues rank among the top user complaints (Nexus Mods Community Reports). Next, verify game version compatibility—many crashes stem from mismatched updates. Then, download from reputable sources only; cybersecurity researchers at Kaspersky report that unofficial game downloads frequently bundle malware. After that, use a mod manager to control load order and detect conflicts automatically. Finally, test mods one at a time. This structured approach, grounded in safe mod installation practices, dramatically reduces instability and protects your system long term.
Laying the Groundwork: 3 Non-Negotiable Prep Steps
First rule of modding: protect your base game. Before you download a single file, back up everything. On Steam, right-click the game → Properties → Installed Files → “Backup game files.” Also manually copy your installation folder and your save files (usually in Documents/My Games) to a separate drive. Some players argue this is overkill because “mods rarely break anything.” Until they do. One corrupted save can wipe 60+ hours—basically the Red Wedding of your playthrough.
- Back Up Everything (your ultimate safety net)
- Understand the Game’s Modding Needs
- Only Use Reputable Mod Sources
Different games require different tools. Script Extenders—add-on programs that expand a game’s scripting capabilities—are essential for titles like SKSE for Skyrim or F4SE for Fallout 4. Others rely on strict folder structures such as /mods or /addons. Skip these steps and your mod simply won’t load (or worse, it half-loads).
Finally, stick to trusted platforms like Nexus Mods, Steam Workshop, and CurseForge. Yes, smaller sites may offer “exclusive” files—but they also increase malware risk. Reputable hubs use community vetting and scanning processes (Nexus Mods, 2023). If you want to use safe mod installation practices, this is non-negotiable. Pro tip: read the comments section before downloading.
The Modder’s Best Friend: Why You Must Use a Mod Manager

I learned this the hard way.
The first time I modded a game, I did what every impatient beginner does: dragged and dropped files straight into the game folder. It worked—until it didn’t. Textures broke. Quests glitched. Then the game wouldn’t launch at all. Why? Because manual installation permanently overwrites core game files. Once those files are replaced, there’s no clean “undo” button.
Worse, uninstalling becomes guesswork. Which files were original? Which came from that lighting overhaul? When mods conflict (meaning two mods try to change the same file), you’re left troubleshooting like a detective in a crime drama (minus the cool soundtrack).
That’s why you need a mod manager.
Choosing Your Tool
Two industry standards dominate:
- Vortex – Ideal for beginners. It offers a clean interface and automated conflict resolution (the process of deciding which mod “wins” when files clash). It’s approachable and forgiving.
- Mod Organizer 2 (MO2) – The advanced favorite. It uses a virtual file system, meaning it never alters original game files. Mods load separately, giving you total control and unmatched safety.
Some argue manual installs give “full control.” I used to believe that too. In reality, control without structure is chaos. Mod managers provide both.
Initial Setup Checklist
- Link your Nexus Mods account.
- Point the manager to your game’s executable file.
- Set download and mod staging folders.
- Enable deployment or virtual file system.
Use safe mod installation practices from day one.
If you’re new, start with getting started with game modding tools for beginners.
Pro tip: Always back up save files before testing new load orders. (Future you will be grateful.)
From Download to Gameplay: The Safe Installation Workflow
Modding has come a long way. Back in 2015, many players still dragged files manually into game folders (and hoped for the best). Today, the process is smoother—but only if you follow a structured workflow.
Step 1: Read the Mod Page Carefully
This is the most critical step. Before you download anything, read the full description. Look for requirements (files the mod needs to work), dependencies (other mods that must be installed first), and known incompatibilities. A dependency simply means one mod relies on another—like needing the base game before installing an expansion. Skipping this step is how most crashes happen (yes, even for experienced players).
Step 2: Install Through the Manager
Always use the “Download with Manager” or “Vortex” button on Nexus Mods. A mod manager is software that automatically places files in the correct directories. This reduces human error and keeps your setup organized. Manual installs might seem faster, but one misplaced file can break everything. Use safe mod installation practices.
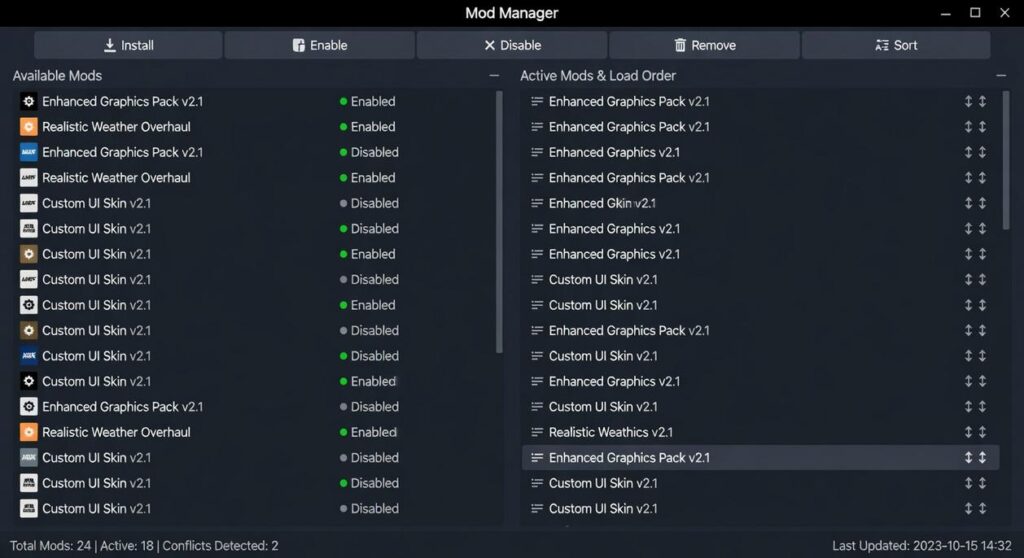
Step 3: Manage Your Load Order
Load order is the sequence in which your game loads mod files. If two mods change the same texture or script, the one loaded last usually “wins.” Tools like LOOT (Load Order Optimisation Tool) analyze and sort this automatically, though you should still follow the author’s placement notes.
Step 4: Deploy, Enable, and Test Incrementally
Install one or two major mods at a time. Deploy, launch, test. This makes troubleshooting simple and saves hours of guesswork later.
When your game crashes to desktop the moment you hit play, the silence after the intro logo feels ominous. Usually, that crash signals a missing master file or a brutal load order conflict. Check your mod manager; it often flashes warnings in bright red.
Meanwhile, if you see glaring purple objects glowing like neon gum, textures are missing or overwritten. Open the conflict panel and trace what changed.
Finally, if a mod stays invisible, ensure it’s enabled and rerun required patchers. Use safe mod installation practices to avoid these headaches. Listen for error chimes and read logs carefully before proceeding.
You now have the knowledge to move beyond risky manual installs and build a stable, customized setup. First, choose a reputable mod manager like Vortex or Mod Organizer 2; these tools isolate files and prevent overwrite conflicts. Next, create a clean backup of your base game (yes, even if you think you won’t need it). Then add mods in small batches—two or three at a time—and launch the game to test performance. If issues appear, you’ll know the culprit immediately. Finally, document your load order. Use safe mod installation practices every time. In short, discipline turns chaos into immersive fun.
Level Up Your Modding Experience Today
You came here to find smarter ways to stay ahead of tech trends, discover powerful modding tools, and optimize your digital setup without the usual frustration. Now you have a clearer path forward.
The biggest pain point for most modders and tech enthusiasts isn’t creativity — it’s wasted time, broken builds, security risks, and outdated frameworks that slow everything down. When you follow safe mod installation practices, stay current with emerging tools, and apply proven optimization strategies, you protect your system and unlock peak performance at the same time.
Now it’s time to act. Start applying what you’ve learned, upgrade your toolkit, and stay alert to the latest innovation updates so you’re never behind the curve.
If you’re serious about smoother installs, faster performance, and zero guesswork, tap into the #1 rated source for modding insights and tech optimization alerts. Explore the latest guides, implement the strategies today, and transform your setup into the high-performance system it should be.
 Syldric Xevandor, the visionary founder of LCF Mod Geeks, stands at the forefront of modern tech innovation, blending deep technical expertise with a passion for digital evolution. Through his platform, he delivers cutting-edge insights on emerging trends, advanced coding frameworks, modding tools, and performance optimization, empowering a new generation of developers and tech enthusiasts. His mission is simple yet powerful: to make complex technology more accessible, practical, and inspiring for those who want to build, customize, and push the limits of the digital world.